Step by step on how to create a DIY milk bath photoshoot
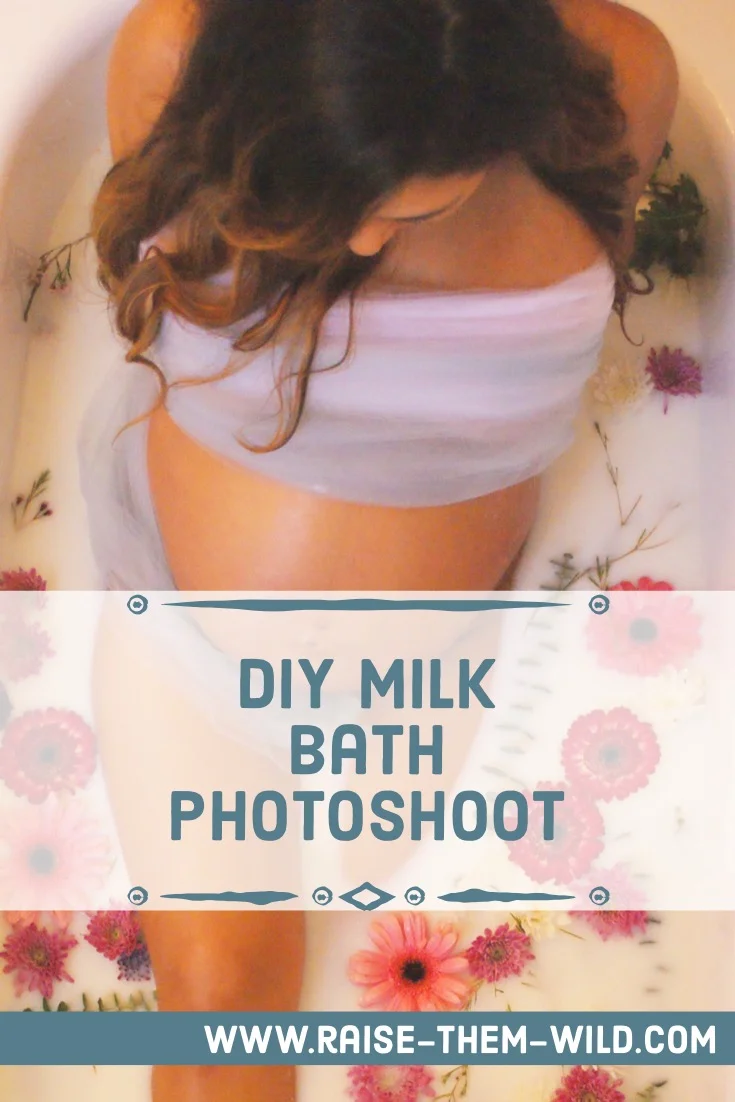
During my pregnancy I went a little wild on pintrest, saving all these DIY projects I would create with my belly. I stumbled upon these milk bath photoshoots and I thought they were so gorgeous. I thought it seemed like a fun little project to create myself, so of course I showed my husband and I told him get ready to take some pictures of me we are doing this! He thought I was so weird and he thought the idea was so gross of me just sitting in milk taking pictures. The time you are sitting in milk is short and yes you will smell like milk but you get to shower right away! Once we were done and my husband saw the finished product he loved the images so it was all totally worth it!
Supplies needed for maternity milk bath:
fresh flowers
dry powdered milk
1 gallon of whole milk
bath tub
a lace gown or material (I used tulle to cover up with)
How to create a milk bath
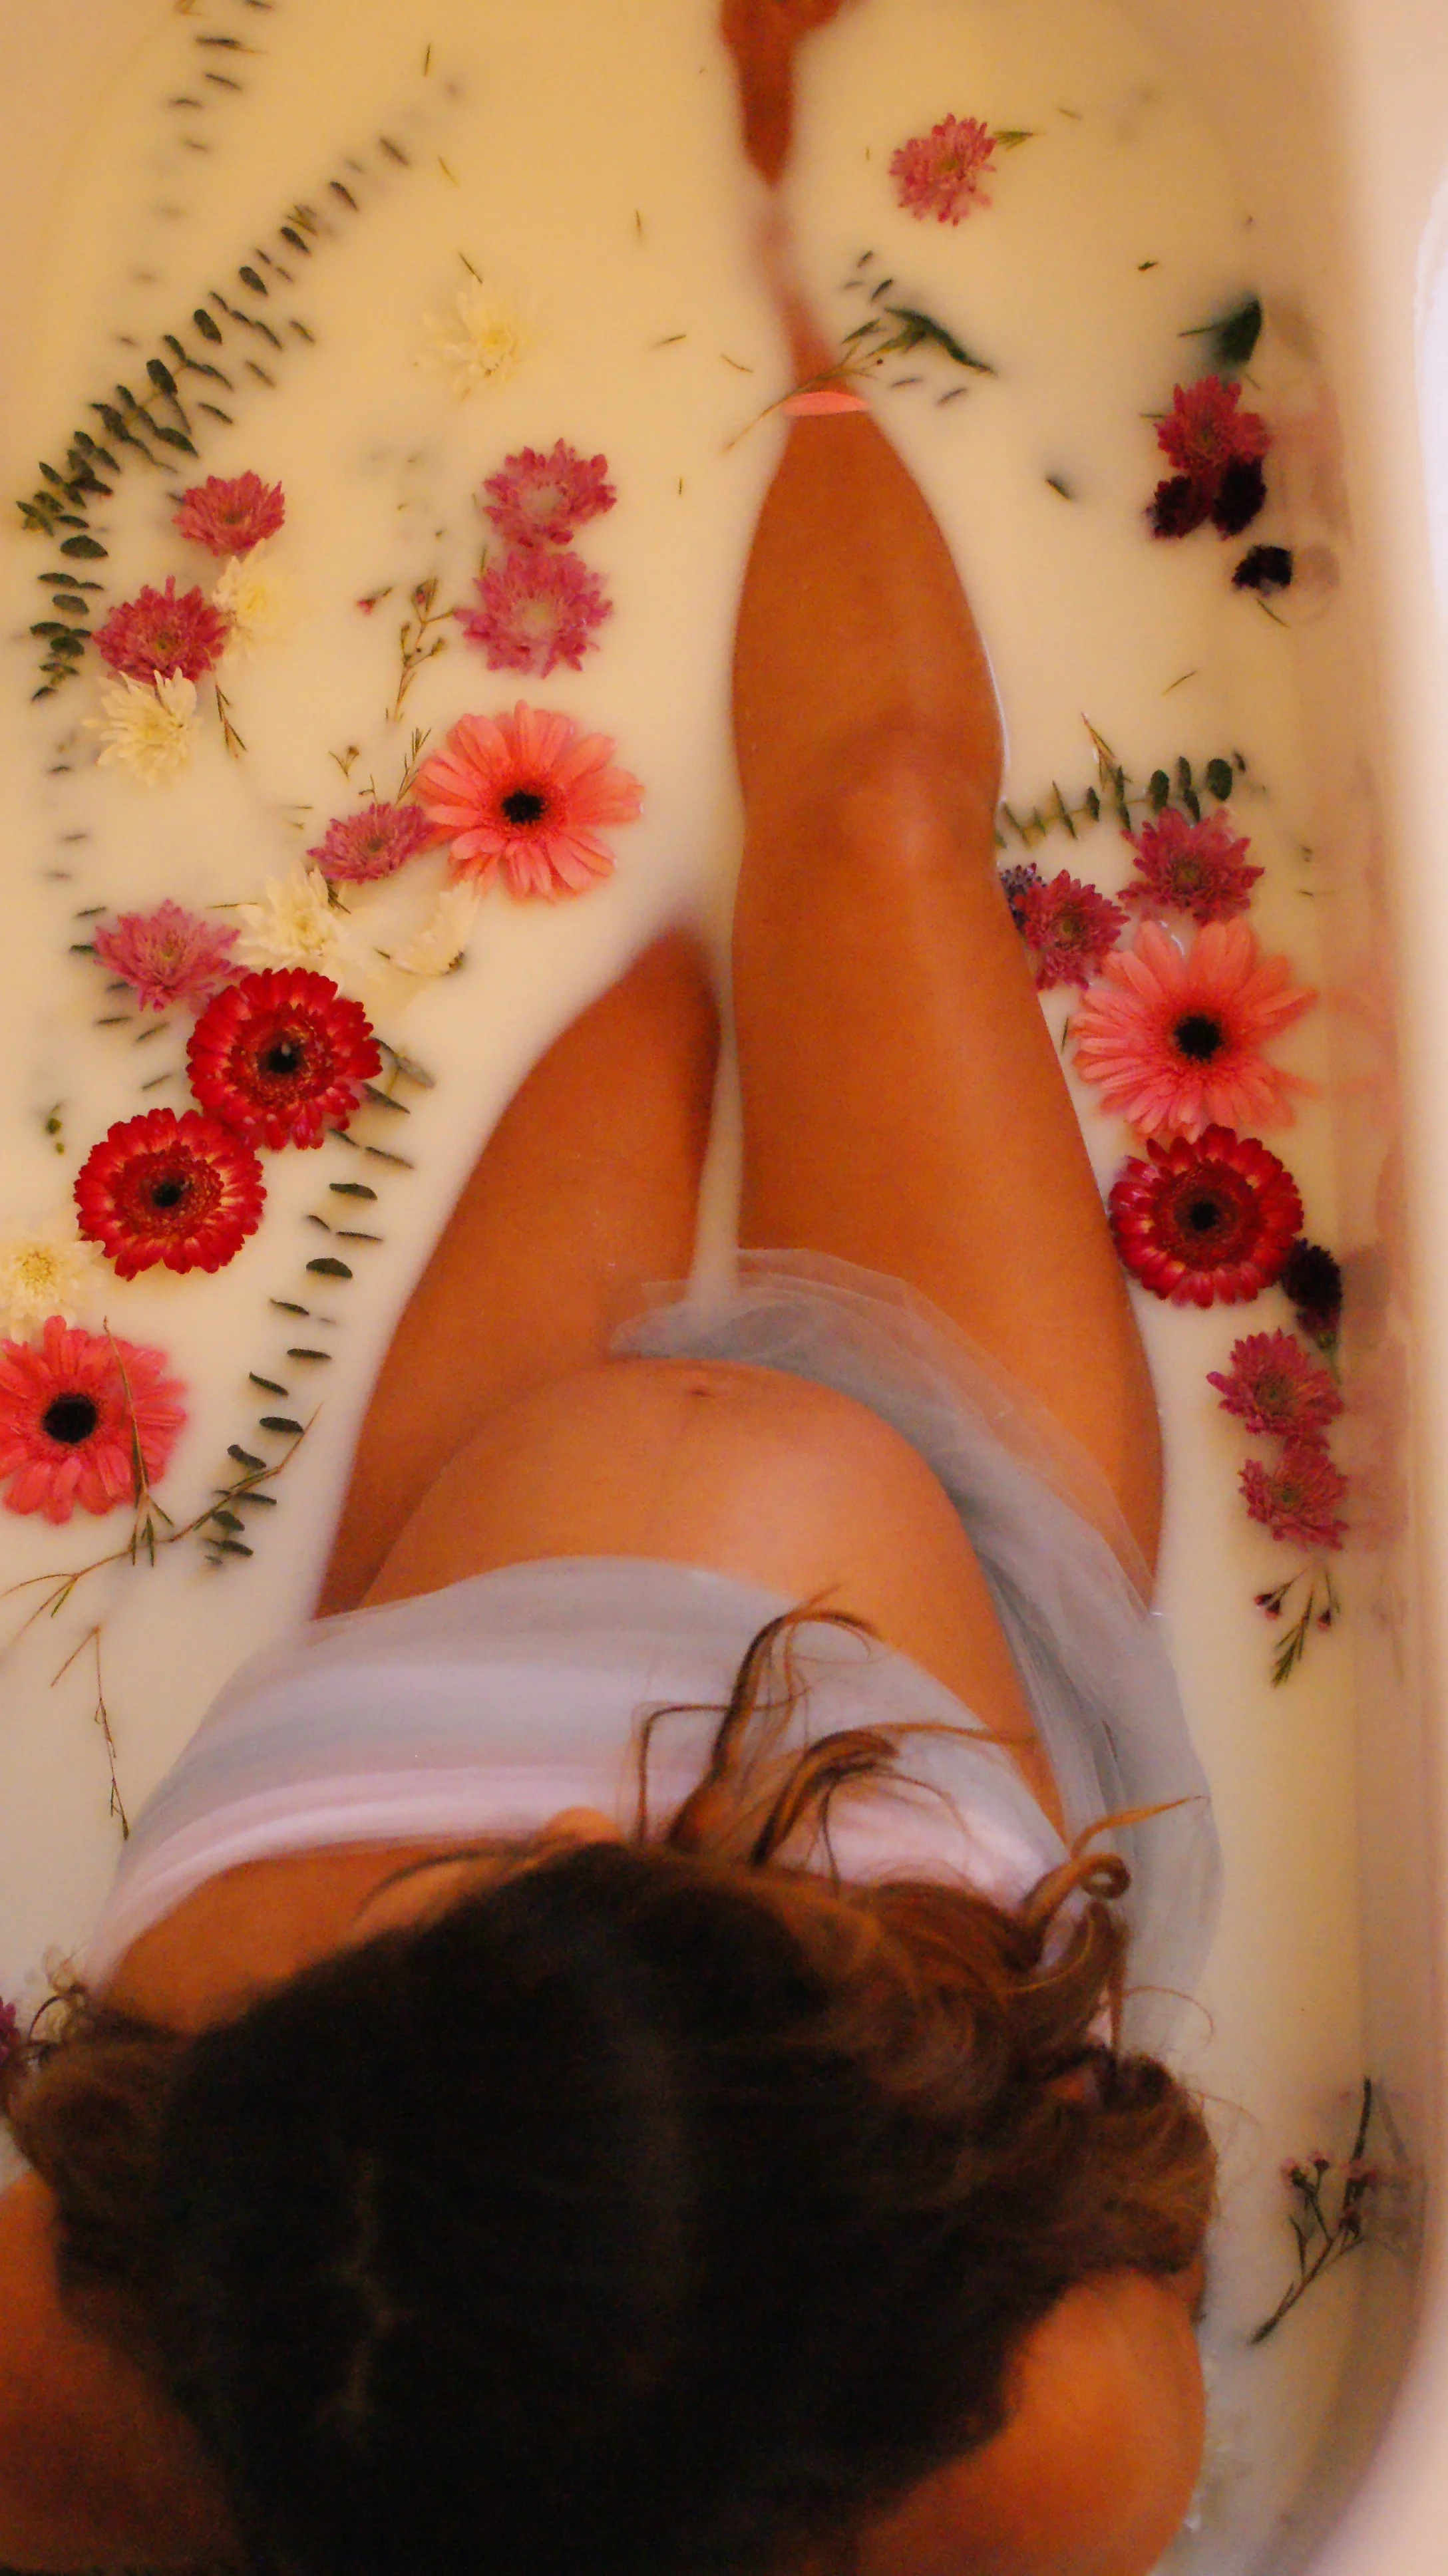
I filled up my bath tub with about a 1/4 of warm water and I put the entire bag of dry powdered milk into that and stir it up so that the milk dissolves. After that I added my gallon of milk. Depending on how much liquid you have in the bath tub you may need to add a little bit more water. You will have to experiment a bit depending on your body size. When you lay in the bath tub you want to make sure the milk doesn’t cover your body you want your belly and legs to stick out a bit.
Setting up for pictures
This is a project where you need at least 2 people to help with. Once the milk bath is ready put on what ever out fit you are wear, and place your self into the bath tub. Have the flowers cut and ready. I purchased fresh flowers from trader joe’s. I noticed that the larger flowers worked better. Smaller ones tended to sink so whatever flowers you are using make sure the model is set and ready in the bath then place flowers and shoot the pictures quickly. It is important to place the flowers in last because when the water moves water will splash over the flowers and they may sink.
Shooting the pictures
My husband took the pictures, he is no professional photographer by any means. We opened up windows in the bathroom to try to let in as much natural light as possible. Our bathroom is small but we made it work. He stood up on the edges of the bath tub and took many pictures from up above. He took some from behind. Just play around have fun and try different angles. Of course if you have a professional photographer i’m sure the pictures would turn out a lot better but if you are “ballin’ on a budget” this is the way to go!
Beyond maternity pictures
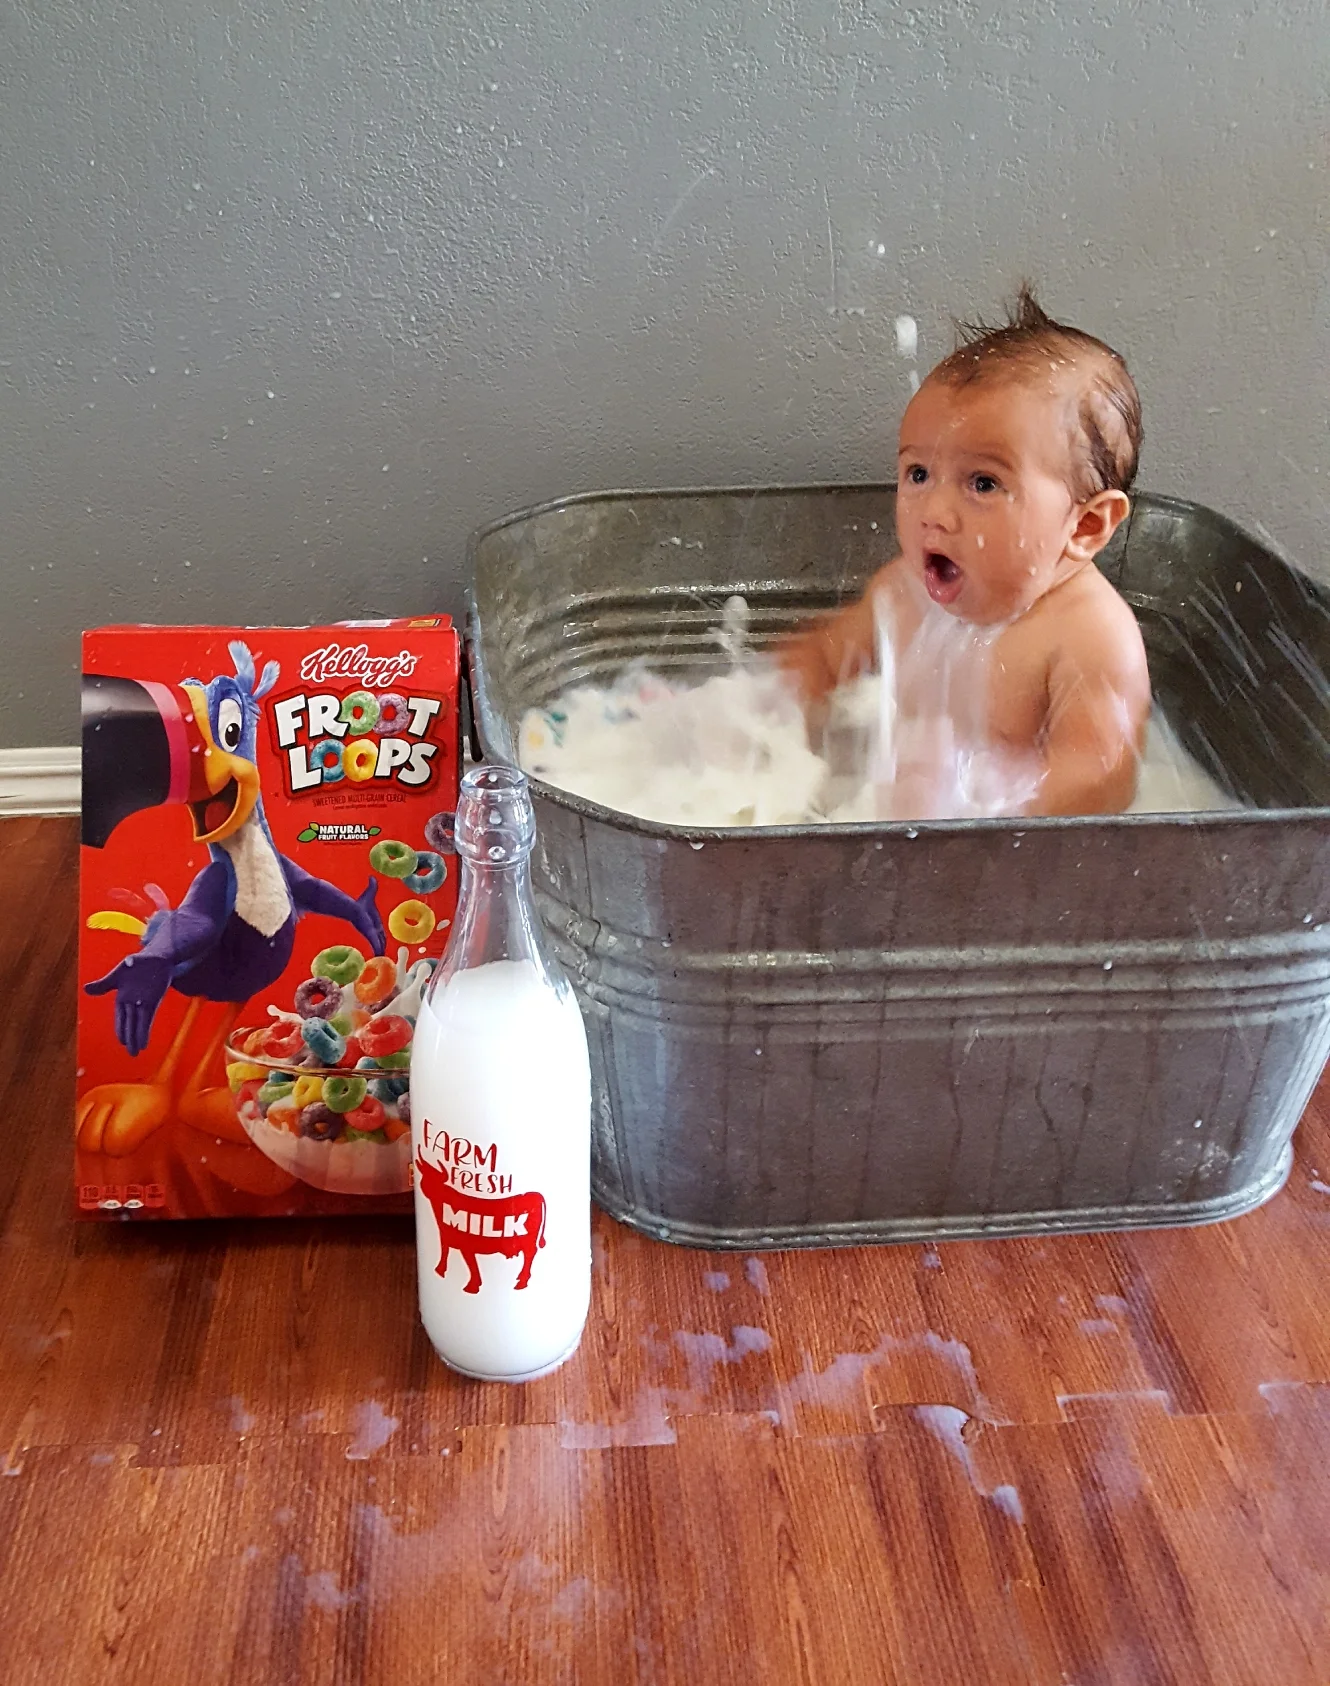
After creating my maternity pictures I knew I would want to recreate them when my baby was finally here. I ended up changing the theme with my son. I created the pictures with just him and we did a milk and cereal bath. Same concept we just used a steel bucket and at the time he was 6 months so it was a little wild. Make sure you have a mop to clean up afterwards!

* this page contains affiliate links. If you purchase anything through them, as an Amazon Associate I earn from qualifying purchases & you will be supporting me and my blog at no extra cost to you, so thank you!